Do I have to install Arch??
I've been using Linux for the past three years and found it pretty exciting. I started out with ubuntu 14.04 and never looked back since then. After a while, I completely shifted to Linux. I literally had fun with Linux. As a rule of thumb, after a while, I got bored of ubuntu. Limited by the customizability, I was looking for an alternative. That's when I came across arch Linux and tried installing it. I can't say that I got it right in a single go, but I've been constantly learning.
Arch Linux is released in both 32-bit as well as 64-bit architecture. Arch is stable and simple. The (maybe called) motto of the arch is to "KISS: Keep it simple, stupid". Don't want something?? No problemo, you don't want to install it. In the other flavors of Linux, this wasn't the scenario. Moreover, arch gets a majority of the updates earlier any other os.
Arch is designed by the user community for the community. The arch user repository (AUR) has a variety of applications and can be easily installed using yaourt. Moreover, you have the freedom of total system control and you can decide what you want, unlike ubuntu. If you want to know more about the arch, refer the official Arch Linux website.
Let's build it!! Yay!!
My Archie desktop:
 |
| fig 1. System Background. |
 |
| fig 2. Start menu with the desktop in the background |
Installation Videos:
Configuring VirtualBox:
Skip the VirtualBox configuration if you intend to install Arch directly.
Installing Arch's core components:
Configuring VirtualBox:
Skip the VirtualBox configuration if you intend to install Arch directly.
Installing Arch's core components:
Installation Process:
Get your Arch .iso files from here.
To start with, you can refer the arch official installation guide. If you find it difficult to follow, I've made a couple of videos. You can check it out here.
Creating Bootable USB drive
Once you obtain your .iso file, you can use any of the disk image creators and generate a USB bootable drive. I used Universal USB installer. You can get it from here. ( Assuming you are using Windows).
Once you create a USB bootable disk, reboot your system. Note that it is better if you perform a complete shutdown using cmd*.
Powering off Your Windows System Using CMD
Open the search menu in windows start menu and search for CMD. Once you get a match, right click on it and run as administrator.
shutdown /s /t 0
Modifications in Bios
Once you reboot, repeatedly tap the f10 (might vary for you) to get into the bios.
 |
| fig 3. Boot menu for bios settings. |
Once you're in the bios, search for boot options and hit enter.
 |
| fig 4. Bios options |
Once you get into the Boot options, search for legacy support and secure boot.
 |
| fig 5. Legacy support |
 |
| fig 6. Secure Boot |
Enable legacy support and disable secure boot.
Booting into the USB live disk
Once you've completed the modifications in bios, the system will restart. Repeatedly tap F9 (might be different for you) until the boot options appear. Search for the USB drive and boot into it.
 |
| fig 7. Boot options |
Arch Linux Boot
Once you select the appropriate drive, you will be displayed with the following image in a few second.
 |
| fig 8. Arch Boot Menu |
Select the "Boot Arch Linux" option and wait for a while... The following windows should be displayed once your boot process is successful.
 |
| fig 9. Successful Boot |
Partitioning the Hard Disk
First, we have to create partitions on the hard drive for installing the Linux system as well as the swap location (Optional) and for grub. I prefer creating three partitions. One for root, one for swap and another for boot. You have two options on how you're going to store the partition information on your disk. The GUID partition table (GPT) and master boot record (MBR).
GPT offers the ability to create virtually unlimited number of partitions on your HDD (Ignoring the fact that windows restrict it to 128). While, MBR can't handle disk on the north of 2TB. Moreover, GPT also stores the cyclic redundancy check values due to which it has the ability to perform data integrity check.
To get the details about the partitions on your hard disk...
sudo fdisk -l
 |
| fig 10. Details of the partitions on your HDD. |
I personally prefer using gdisk to create the partitions. As mentioned above, I'll be creating three partitions to start with. Do note that if you wish to install arch along with windows or any other os, do not create the boot partition. I repeat, do not create the boot partition. :P
The typical size of the partitions is at the disposal of the user. I allocated about 512 Mib for my boot, 10 Gib for swap and the rest for root. You can allocate the size of each partition according to your requirements. It is recommended that you allocate about 500 Mib for the boot partition for security and system maintenance reasons.
To use the gdisk utility...
sudo gdisk /dev/sda
 |
| fig 11. gdisk utility for creating new partitions. |
If you see something similar on your screen, gdisk is working perfectly for you .. Whooo..
Moving on, we still have 3 partitions to go!! Yikes!!
Creating the Boot partition:
Do not perform this if you wish to install arch along with windows. I'm creating this partition on a fresh disk which contains no EFI partition. If you're performing a dual boot sorta' install, EFI partition will be present on the disk.
In the gdisk utility, to create a new partition, Enter the following carefully. One mistake and you'll have to start over from the beginning.
In the gdisk utility, to create a new partition, Enter the following carefully. One mistake and you'll have to start over from the beginning.
Command (? for help): n
Partition Number (1-128, default 1): 1
First sector ( x-y, default = x) or {+-}size{KMGTP}: " hit enter"
Last sector ( x-y, default = x) or {+-}size{KMGTP}: +512M
Partition Number (1-128, default 1): 1
First sector ( x-y, default = x) or {+-}size{KMGTP}: " hit enter"
Last sector ( x-y, default = x) or {+-}size{KMGTP}: +512M
 |
| fig 12. Creating the boot partition using gdisk utility. |
We have created the boot partition. Let's move on to creating a partition for swap.
Creating the Swap partition:
Swap is used as an extension of ram. Creating swap is completely optional. If your system memory is large enough, you don't have to bother creating swap. I've never seen my swap being used. Not even once. Maybe I should rephrase it. Both my ram as well as swap were completely filled when I tried to run a brute for computing the powerset for a hundred-element set. Naive me!!
Swap is used as an extension of ram. Creating swap is completely optional. If your system memory is large enough, you don't have to bother creating swap. I've never seen my swap being used. Not even once. Maybe I should rephrase it. Both my ram as well as swap were completely filled when I tried to run a brute for computing the powerset for a hundred-element set. Naive me!!
The process is similar to the previous one. Enter the following if you are following the blog on creating the partitions. Else, modify it accordingly.
Command (? for help): n
Partition Number (1-128, default 1): 2
First sector ( x-y, default = x) or {+-}size{KMGTP}: " hit enter"
Last sector ( x-y, default = x) or {+-}size{KMGTP}: +1G
Hex code or GUID ( L to show code, Enter = 8300): 8200
Partition Number (1-128, default 1): 2
First sector ( x-y, default = x) or {+-}size{KMGTP}: " hit enter"
Last sector ( x-y, default = x) or {+-}size{KMGTP}: +1G
Hex code or GUID ( L to show code, Enter = 8300): 8200
 |
| fig 13. Creating the Linux swap using gdisk utility. |
Finally, we have one more partition to go!!
The root partition is where your system is going to reside. It's recommended to allocate about 50 GiB
to root for future enhancements.
The steps are similar. But, if you don't follow the order, make some changes accordingly. Damn, this is turning booring!!
Creating the Root partition:
The root partition is where your system is going to reside. It's recommended to allocate about 50 GiB
to root for future enhancements.
The steps are similar. But, if you don't follow the order, make some changes accordingly. Damn, this is turning booring!!
Command (? for help): n
Partition Number (1-128, default 1): 3
First sector ( x-y, default = x) or {+-}size{KMGTP}: " hit enter"
Last sector ( x-y, default = x) or {+-}size{KMGTP}: " hit enter or the size accordingly"
First sector ( x-y, default = x) or {+-}size{KMGTP}: " hit enter"
Last sector ( x-y, default = x) or {+-}size{KMGTP}: " hit enter or the size accordingly"
 |
| fig 14. Creating root partition using gdisk utility. |
Yay!! Looks like, I'm done with partitioning.

Finally, we're done with partitioning... Let's move on to formatting the newly created partitions before installing arch.
Formatting the /swap partition
Formatting the /root partition
Ahhh, We're finally done with disk related operations.
No more disk operations!! Yay!! Damn it carl, it's been a long process.

Final step in partitioning:
The final step before you ditch gdisk for good is to write the changes you have made to the partition table. If you skip this, the effort for partitioning the disk would be gone!! ta-ta.
Don't give up yet!! We've just started.
Type the following in the gdisk utility before exiting it.
Command (? for help): w
 |
| fig 15. Saving the changes to the disk. |
Finally, we're done with partitioning... Let's move on to formatting the newly created partitions before installing arch.
Formatting the Newly Created Partitions:
Previously, if you recall, you've created three partitions on the disk. Now, it's the time for formatting and making them useful. /boot (/dev/sda1) partition should be formatted with .fat format to make it suitable for the installation of EFI files.
The swap partition is already in the required format. We have to tweak it a bit and turn it on. Finally, the /root partition has to be formatted with .ext4 to facilitate the installation of the arch system.
Formatting /boot partition
As mentioned earlier, the /boot partition should be in the fat format for EFI installation.
Caution: Don't format the EFI partition if you are installing arch along with windows.
Type the following into your terminal console carefully. Make changes accordingly.
sudo mkfs.fat -F32 /dev/sda1
 |
| fig 16. Formatting the /boot partition. |
Formatting the /swap partition
The swap partition acts as an extension of ram. Once the partition has been formatted, it can be turned on.
Type the following carefully into your arch terminal... Make the changes accordingly if you have deviated from the instructions.
sudo mkswap -L " [Your Desired Partition Name] " /dev/sda2
 |
| fig 17. Formatting and Turning on the /swap partition |
Formatting the /root partition
/root is where you'll be installing the arch kernel and other system files. The /root partition has to be in the ext4 format to make it suitable for installation.
Type in the following carefully into your arch terminal. Any changes, do it accordingly.
sudo mkfs.ext4 -L " [Your Desired Partition Name] " /dev/sda
 |
| fig 18. Formatting /root partition. |
Installing Arch Base Packages
Before you begin the installation process, you need to set the destination for install and set the preferences so that it'd be easy during configuration.
Mounting /root partition on /mnt
Prior to installation, the /root partition has to be mounted at /mnt so that it can act as a container which can further hold other partitions if any along with the system files. In the mount code, change the partition accordingly.
/dev/sdaX can be mounted at /mnt using the mount command. To know more about mount, click here.
sudo mount /dev/sda3 /mnt
 |
| fig 19. Mounting /dev/sda3 at /mnt |
Once the base partition is mounted, we can proceed forward with the installation. Let's check if we have network connectivity.
Checking Network Connectivity
It's is essential to check the network status before proceeding with the installation to save some hassle and save yourself from breaking your head :P
To check the network status, Type the following into your arch terminal.
sudo ping www.google.com
If your system has network connectivity, you should see something similar to that in the image.
 |
| fig 20. Network Status |
Installing base and base-devel
Base and base-devel are the core packages of arch Linux which are essential for its operation. base-devel is very helpful if you wish to build packages for your system. Both base and base-devel can be installed using pacstrap. The installation time depends on your download time. So, hang in there!!
Code for installing base and base-devel
pacstrap /mnt base base-devel
You should see something similar to that in the image if things go well!!
 |
| f1g 21. Installing base and base-devel using pacstrap |
Time to configure the system... You've successfully installed the core components. Oh, wait!! you still have to install the bootloader.
Creating a directory for /boot partition
Now that you've installed the core packages, it's time for some tweaks. A "boot" directory in /mnt is to be created for mounting the /boot partition. Once created, /boot can be mounted followed by GRUB installation.
Code for creating a directory for /boot in /mnt
mkdir -p /mnt/boot/efi
 |
| fig 20. Creating a directory for /boot in /mnt |
Code for mounting /boot at /mnt/boot/efi. If you have a different set of partitions, change /dev/sdaX accordingly.
sudo mount /dev/sda1 /mnt/boot/efi
 |
| fig 21. Mounting /boot at /mnt/boot/efi |
Generating fstab for Automatic Mount of Partitions during Boot:
Now that you have created, formatted and mounted all the partitions, Do you want to mount them each and every time you power-on your system?? No, you don't need to. That's where fstab comes in. fstab automatically mounts the partitions at the specified location for you. Imagine mounting each and every partition every time you turn your arch on. That'd be tedious.
fstab can be generated with a single line. Hail, fstab!!
genfstab -p /mnt >> /mnt/etc/fstab
 |
| fig 22. Generating fstab |
Configuring the Arch Installation
After the installation of base packages, there are tons of tweaks to be performed. Chroot'ing into arch installation would be a start.
Chroot'ing into Arch Installation
Chroot is also known as change-root. The main reasons for performing chroot is:
- Reinstalling the bootloader,
- Rebuilding the initramfs,
- Upgrading or downgrading certain packages, and,
- Resetting a forgotten password.
Code for chroot,
arch-chroot /mnt
 |
| fig 23. Chroot'ing into arch installation |
Creating Password Authentication for Root
It is mandatory to create a password for root/super user so that unauthorized access to the system files, operations, etc. can be prevented. In Linux, almost everything is basically a collection of few lines of texts which on misuse can be catastrophic.
Code for adding password for root,
passwd
 |
| fig 24. Adding a password for root |
Setting of Locales
Locale is a place where something happens or is set , or that has particular events associated with it.
Locales are used by various applications such as glibc, for instance, for rendering texts, displaying monetary values flawlessly, date and time formats, etc.
The locale.gen file has to be modified followed by generating the locales.
Modifying locale.gen file. The locale.gen file can be viewed and modified using nano editor.
sudo nano /etc/locale.gen
 |
| fig 25. Reading locale.gen using nano |
In the locale.gen file, remove "#" from en_US.UTF-8 UTF-8
 |
| fig 26. Removing "#" in en_US.UTF-8 UTF-8 |
locale-gen
 |
| fig 27. Generating New locale Configuration |
After setting locales, The LANG variable has to be configured.
Configuring LANG (Locale Environment) Variable
The LANG variable Specifies the installation default locale. The "LANG" environment variable determines the language in which software programs communicates with the user.
LANG variable can be set by redirecting output from echo into locale environment variable.
echo en_US.UTF-8 US.UTF-8 >> /etc/locale.conf
 |
| fig 28. Setting LANG locale environment variable |
Generating Initial Ram Disk
The initial ramdisk can be treated as a module which loads various modules and setup the necessary things before handing over the control to init. During the early days of Linux, kernel was responsible for detection and initialization of all hardware during the boot process before mounting the root file system and handing the control over to init. But, things got complicated with time. That's where the initial ram disk comes into the picture.
Initial ramdisk environment can be generated using mkinitcpio.
mkinitcpio -p linux
 |
| fig 29. Initial ramdisk generation |
Setting Local Time Zone
As mentioned earlier, almost everything in Linux is a few bunch of text. The local time zone can be set by just redirecting the timezone info into /etc/localtime file. Choose your time zone accordingly.
ln -S /usr/share/zoneinfo/Zone/Sub-zone /etc/localtime
 |
| fig 30. Setting Local Time Zone |
Installing Boot Loader
Bootloader is responsible for loading the kernel and initial ramdisk into memory before initiating the boot process. Assuming that you are installing via. UEFI, it has support for reading partition table as well as understanding the file system. UEFI does not launch any boot code in MBR/GPT regardless of its existence. It instead uses a special partition know as EFI system partition which contains the files that are to be launched by the firmware during the boot process. Grand Unified Boot Loader (GRUB) is commonly preferred among the several other alternatives available.
Installation of GRUB takes place in stages. GRUB has to be downloaded from its repository. Followed by, generating the GRUB configuration and installing grub to the disk where arch core exists.
Downloading GRUB bootloader: GRUB can be installed using pacman. Pacman retrieves GRUB from its repositories and installs it.
Downloading GRUB bootloader: GRUB can be installed using pacman. Pacman retrieves GRUB from its repositories and installs it.
sudo pacman -Syu grub
 |
| fig 31. Grub installation |
Downloading efibootmgr: efibootmgr is a user application which is capable of modifying the EFI boot manager. It can create and delete boot entries, change the boot order, etc.
sudo pacman -Syu efibootmgr
 |
| fig 32. Installing efibootmgr |
Generating GRUB configuration file: The configuration file residing at /boot/EFI/efi/grub is used for creating a list of operating systems which is in turn used in GRUB's menu interface allowing the user to select a pre-set group of commands to execute.
sudo pacman -Syu efibootmgr
 |
| fig 33. Generating GRUB configuration file |
Installing GRUB onto Root file system: The final step is to install GRUB to the root file system.
sudo grub-install /dev/sda
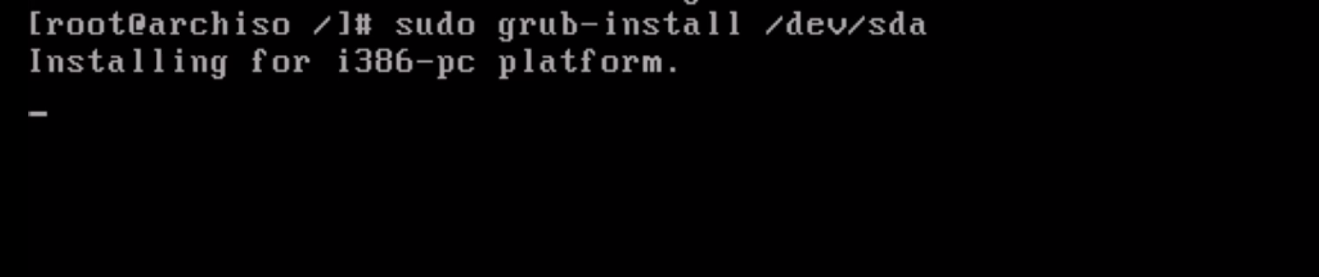 |
| fig 30. Installing GRUB to disk |
Logging off and Powering the System Down
Exit from the root by typing
exit
and power-off the system by typing
poweroff
Now that the core and essential components of arch have been installed, it's time for installing user interface, terminal emulators, etc which will be published in the next blog post.

Found the post useful?? Subscribe for more. Stay Tuned!!
ConversionConversion EmoticonEmoticon